Do you live in an apartment and are lucky enough to have a balcony? This is an excellent opportunity to consider installing an apartment solar panel. This solution allows you to produce your own electricity, reduce your bills, and do your part for the planet. But before you dive in, there are a few points to consider. This article guides you through the steps for a successful installation.
Key Takeaways
- Understanding the basic operation of an apartment solar panel, including the photovoltaic effect and the role of the inverter, is the first step.
- It is essential to assess technical feasibility: check the sunlight, your balcony’s orientation, available space, and structural integrity.
- Before any installation, consult the co-ownership regulations and inform your landlord if you are a tenant to avoid any issues.
- Choosing the right solar kit for your balcony depends on the desired power, panel type (monocrystalline recommended), and available space.
- Optimizing production involves adjusting the panel tilt according to the seasons and ensuring a good Wi-Fi connection for monitoring.
Understanding How Apartment Solar Panels Work
Are you considering installing a solar panel on your balcony or terrace to produce your own electricity? It’s an excellent idea to reduce your bills and contribute to the planet. But before you get started, it’s important to understand how these systems work. This will help you make the right choices and optimize your installation.
The Principle of the Photovoltaic Effect
The heart of any solar panel is the photovoltaic effect. This is a physical phenomenon discovered long ago, which allows sunlight to be directly converted into electricity. The panels are made of cells made of silicon. When photons, which are actually particles of sunlight, strike these cells, they excite the electrons present in the silicon. This movement of electrons creates a direct electric current. It’s a bit like the sun giving the electrons a little push to get them moving.
This direct current is not directly usable by your household appliances, which run on alternating current. This is where a key component of the system comes in.
Difference Between a Balcony Kit and a Roof Panel
If you’ve seen solar panels on house roofs, you might be wondering about the difference with those intended for balconies. The main distinction lies in how they are connected. Balcony solar kits are generally designed to be very easy to install, often called « plug-and-play. » You plug them directly into a standard electrical outlet in your home. Roof installations, on the other hand, are more complex and require a direct connection to the house’s main electrical panel. Balcony kits are therefore more accessible for apartments.
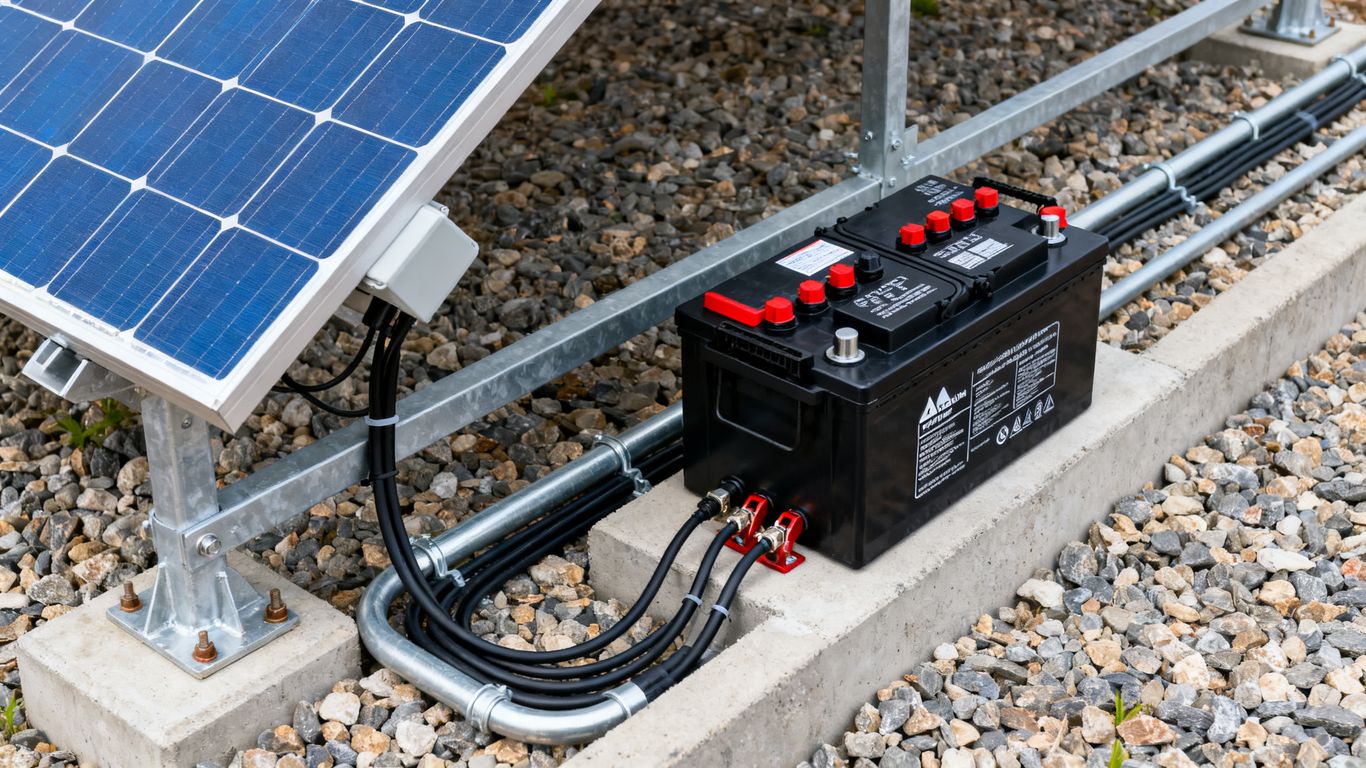
The Role of the Inverter in the System
As mentioned, the current produced by the solar panel is direct current. However, your electrical appliances, your TV, your refrigerator, your computer, all run on alternating current. The inverter, or more specifically the micro-inverter in most balcony kits, is responsible for converting this direct current into alternating current. It acts as a translator between the solar panel and your home’s electrical grid. Without it, the electricity produced could not power your appliances. It’s an essential step to make solar energy usable on a daily basis. Production monitoring can be done via an app, provided you have a good Wi-Fi connection.
Here is a table summarizing the key points:
| Component | Function | Type of Current Handled |
|---|---|---|
| Solar Panel | Captures sunlight and produces electricity | Direct Current |
| Inverter (or Micro-inverter) | Converts direct current to alternating current | Direct Current to Alternating Current |
| Home Grid | Powers electrical appliances | Alternating Current |
Assessing the Technical Feasibility of Installation
Before you start installing a solar panel on your balcony, it’s important to check certain technical points. This will help you ensure that your project is feasible and will be efficient.
Sunlight Conditions and Balcony Orientation
The efficiency of your solar panel will largely depend on the amount of sunlight it receives. Ideally, your balcony should face south to capture the maximum amount of sunlight throughout the day. A southeast or southwest orientation can also be suitable, but a north orientation is generally not recommended as it offers insufficient sunlight for significant electricity production. Therefore, it is crucial to observe the sun’s path on your balcony throughout the seasons.
Required Space and Kit Sizing
Each solar kit has its own dimensions. You will therefore need to measure the available space on your balcony to determine what type and size of panel you can install. Generally, a space of at least 2 m² is recommended. The kit sizing should also match your energy needs. A small kit may be sufficient to power a few appliances, but if you aim for a greater reduction in your bill, you may need to consider a more powerful system. Consider the load the panel represents; a kit typically weighs between 10 and 20 kg.
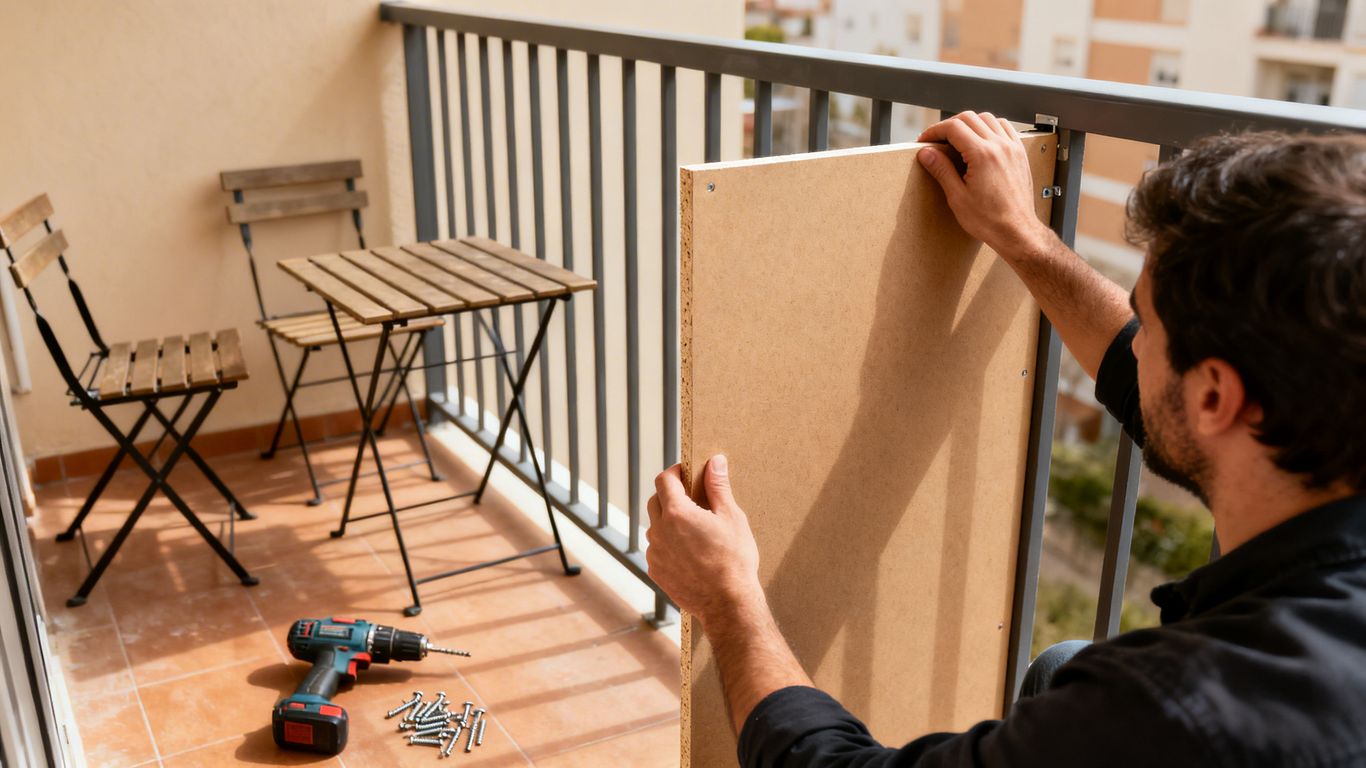
Checking the Structural Integrity of the Balcony
Although balcony solar kits are designed to be relatively lightweight, it’s always wise to ensure that your balcony’s structure can support the additional weight. If you have any doubts, don’t hesitate to consult a professional or inquire with your co-ownership association. It’s important that the installation is safe.
Prior technical assessment is a key step to ensure the safety and efficiency of your solar installation. Ignoring these aspects could lead to performance issues or even structural risks.
Complying with Regulations and Neighborly Conduct
Before you start installing solar panels on your balcony, it is essential to be informed about the current rules. This will help you avoid any inconvenience and ensure peaceful coexistence with your neighbors and the co-ownership.
Consulting the Co-ownership Regulations
The first step is to consult the co-ownership regulations. This document may contain specific clauses regarding facade modifications or the installation of equipment on balconies. It is possible that certain provisions prohibit or strictly regulate this type of installation. Therefore, it is essential to check this point before taking any action.
Informing the Landlord for Tenants
If you are a tenant, you must inform your landlord of your project. Although installing a solar kit is generally reversible, it is good practice to seek their approval. Transparent communication is key to maintaining a good landlord-tenant relationship.
Administrative Procedures for Solar Installations
For solar kits intended for balconies, regulations are often simplified. Generally, these installations, with a power of less than 3 kWp, do not require prior declaration of works with your local town hall. However, it is always prudent to check with your local administration to confirm the specific procedures for your municipality. Remember that any modification to the external appearance of a building may be subject to specific rules, as stipulated by Article R421-17 of the Construction and Housing Code, which considers the installation of panels as a modification of the external appearance [a4f5].
- Check the co-ownership regulations.
- Inform your landlord if you are a tenant.
- Inquire with your town hall about any administrative procedures.
It is important to note that installing solar panels on a balcony, while often simple, can impact the building’s aesthetics. Good communication with the co-ownership management and neighbors can prevent potential conflicts.
Choosing the Right Solar Kit for Your Balcony
For a successful installation on your balcony, choosing the solar kit is a crucial step. Several factors need to be considered to ensure the system meets your needs and fits your space.
Selection Criteria: Power, Panel Type, Manufacturer
When examining the different options, the kit’s power is a central point. It is measured in Watts-peak (Wp) and should be in line with your electricity consumption. A kit that is too powerful might be underutilized, while a kit that is too weak would not be enough to cover your needs. Consider the consumption of your most energy-intensive appliances to better size your installation. The type of panel is also important; monocrystalline panels are generally more efficient than polycrystalline ones, especially in variable sunlight conditions. Finally, the choice of manufacturer can influence quality, durability, and after-sales service. It is often wise to favor brands known for their reliability.
Advantages of Monocrystalline Panels
Monocrystalline panels are distinguished by their uniform black color, a sign of their silicon purity. They offer better energy efficiency per square meter compared to polycrystalline panels. This means they produce more electricity for the same surface area, which is a major advantage when balcony space is limited. Their efficiency remains more consistent, even in low light or cloudy weather. Although their initial cost may be slightly higher, their increased long-term performance can justify the investment. They are often the preferred solution for installations where space is a constraint.
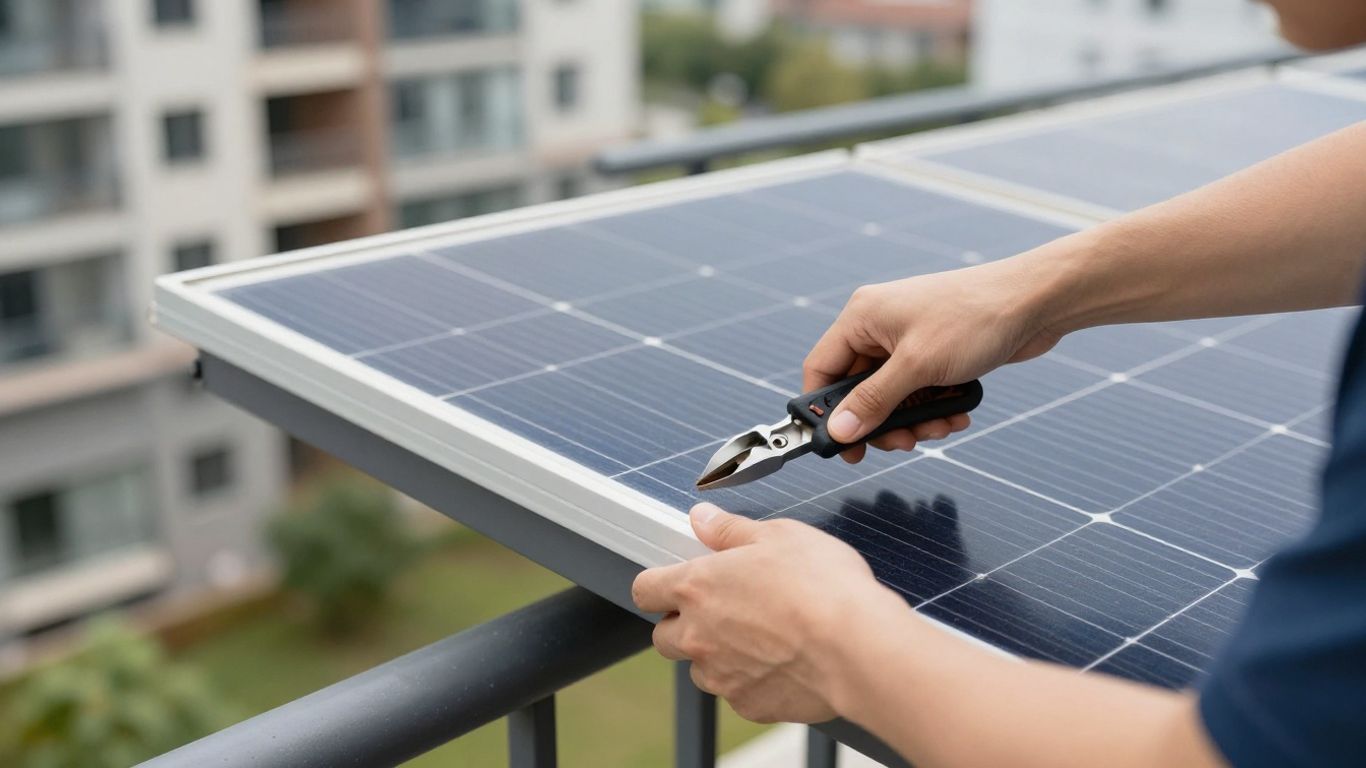
The Importance of Available Balcony Space
The space on your balcony is a fundamental factor. Before even looking at technical specifications, accurately measure the area you have available. Plug-and-play solar kits are designed to be compact, but you still need to plan for their installation without obstructing passage or the opening of doors and windows. Most kits require about 2 m² for comfortable installation. You also need to consider the panel tilt; some kits have adjustable structures that allow you to optimize the angle relative to the sun depending on the season. Good layout planning will allow you to maximize production without sacrificing the use of your balcony. You can find solar kits that install in minutes and are designed to fit various spaces discover plug-and-play kits.
It is essential to verify that the total weight of the solar kit, once installed, does not exceed your balcony’s load capacity. Although these installations are generally lightweight, it is always best to ensure this for safety reasons.
Optimizing Solar Energy Production
Once your solar kit is installed, it’s not enough to just let it do its job. To truly get the most out of your installation, a few adjustments can make a big difference. Think of it like maintaining your car: a little regular attention allows you to drive longer and more efficiently.
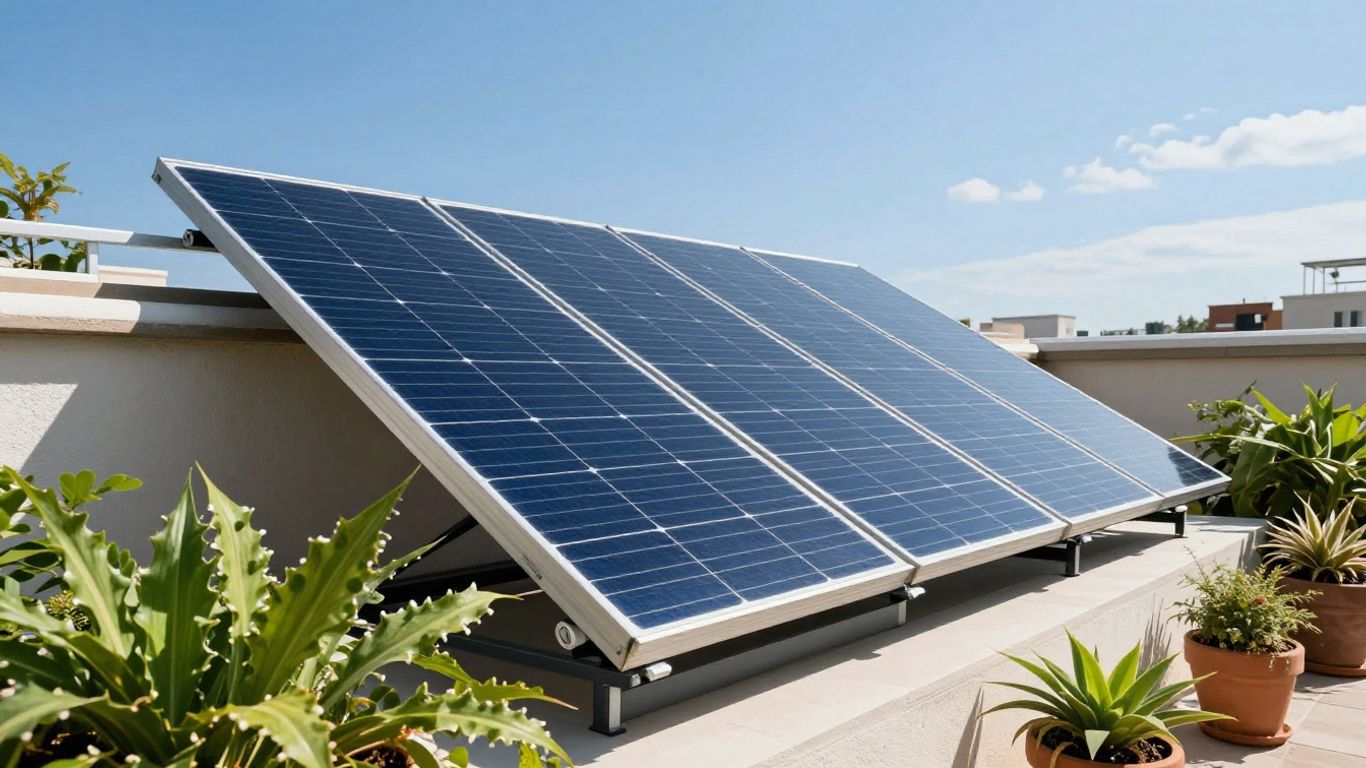
Adjusting Panel Tilt According to Seasons
The angle at which your solar panels face the sun directly impacts the amount of energy they can capture. The sun is not at the same height in the sky in summer as it is in winter. To maximize production, it is therefore wise to adjust the tilt of your panels. Generally, a steeper tilt is beneficial during the winter months to capture the sun’s rays lower on the horizon. In spring and autumn, an average angle is often ideal. In summer, when the sun is highest, a shallower tilt can be more effective.
- Winter: Approximately 60° to capture low-lying rays.
- Spring/Autumn: Approximately 45°.
- Summer: Approximately 20° for high rays.
These adjustments, although sometimes minor, can significantly improve your installation’s yield. Remember that even a slight change can have a positive effect on your electricity production.
Importance of a Good Wi-Fi Connection for Monitoring
To know if your panels are working optimally, it’s essential to be able to monitor their production. Most modern solar kits are equipped with monitoring systems that connect to your home Wi-Fi network. This connection allows you to access valuable data via an app on your smartphone or computer. You can view the amount of electricity produced, peak periods, and even identify potential issues. A stable Wi-Fi connection is therefore key for effective monitoring and for adjusting the tilt or identifying any obstructing shadows. Without it, you are flying blind regarding your installation’s actual performance.
Impact of Geographical Location on Production
It is obvious that where you live plays a major role in the amount of solar energy you can produce. Regions in the south of France benefit from significantly more sunshine than those in the north. For example, a 405 Wp kit installed in Marseille could produce up to 567 kWh per year, while an identical kit in Lille would only produce about 445.5 kWh. This difference is due to the intensity and duration of sunshine. It is therefore important to consider your location when evaluating the expected performance of your balcony solar panel.
While balcony installations may reduce production compared to rooftop installations, optimizing the angle and regular monitoring can compensate for some of this loss. One must remain realistic about the gains, but every kWh produced is a small victory for your wallet and for the planet.
Analyzing the Cost and Profitability of an Apartment Solar Panel
Investing in a solar panel for your balcony or terrace is an interesting step to reduce your electricity bills and participate in the energy transition. However, it is important to carefully evaluate the financial aspects before you begin.
Factors Influencing the Price of a Solar Kit
The cost of a balcony solar kit can vary considerably. Several factors are involved in this estimation:
- Kit Power: Measured in Watts-peak (Wp), it determines the amount of electricity the panel can produce. A more powerful kit will generally be more expensive.
- Number and Type of Panels: Some kits include a single panel, others several. Monocrystalline panels, which are more efficient, can also influence the price.
- Brand and Quality of Materials: Reputable manufacturers and high-quality materials may represent a higher initial investment, but are often a guarantee of durability.
- Included Accessories: Some kits come with battery storage or specific mounting systems, which can alter the price.
- Installation Costs: Although many kits are designed for self-installation (plug-and-play), hiring a professional will incur additional costs.
As a guideline, a 400W solar kit can cost between 700 and 900 euros. It is therefore essential to compare offers to find the one that best suits your budget and needs.
Estimating the Return on Investment Period
The profitability of your installation will depend on several factors, including the amount of energy you produce and consume, as well as the price of the electricity you purchase. On average, for a 405 Wp kit, the return on investment can be between 4 and 6 years. This is due to the savings made on your electricity bills. For example, a 405 Wp kit can produce between 445 and 567 kWh per year depending on your geographical location, which can represent savings of up to 12% of your average annual consumption.
It is important to note that actual production can vary depending on sunshine, your balcony’s orientation, and the presence of any shading. Regular monitoring of your production via a good Wi-Fi connection is therefore recommended to accurately assess profitability.
Financial Aid and Tax Relief Schemes
To make the investment even more accessible, several aid schemes exist. You may be eligible for the self-consumption bonus, which is financial assistance provided for the installation of solar panels intended for personal consumption. Additionally, a reduced VAT rate may apply to the purchase and installation of this equipment. It is advisable to inquire with the relevant authorities or professionals to find out about the aid available in your region and the eligibility conditions. This aid can significantly reduce the initial cost of your installation and accelerate the return on investment. Don’t forget to check the specific conditions if you are a tenant, as special procedures may be necessary, such as informing your landlord.
A Project Within Your Reach
Installing a panel on your balcony or terrace is therefore a perfectly achievable endeavor. By following the steps and taking into account the specifics of your space, you can enjoy the benefits of this installation. Don’t forget to check local regulations and those of your co-ownership before you start. It’s a great way to contribute to a more sustainable future while saving money.
Frequently Asked Questions
Is it really possible to install a solar panel on an apartment balcony?
Absolutely! Even if you live in an apartment, installing a solar panel on your balcony is entirely feasible. There are kits specifically designed for this, called ‘plug and play’ kits, which are smaller and easier to install than large roof panels. They allow you to produce your own electricity.
How does a solar panel installed on a balcony work?
It’s quite simple. The panel captures sunlight thanks to its cells. This energy is then converted by a device called an inverter into electricity that can be used in your home. You then plug it into a standard electrical outlet, much like a household appliance.
What are the conditions for installing a solar panel on my balcony?
For it to work well, your balcony needs to be well-exposed to the sun, ideally facing south. You also need enough space to install the panel without it being a nuisance. Also, consider checking that your balcony’s structure can support the panel’s weight, even if it’s light.
Do I need to ask for permission to install a solar panel on my balcony?
If you are a tenant, it’s always good to inform your landlord. If you are an owner and live in a building with co-ownership, you must consult its regulations. There may be specific rules regarding installations on balconies.
What type of solar panel is best suited for a balcony?
For a balcony, photovoltaic solar kits of the ‘plug and play’ type are generally used. They are more compact. For better efficiency, opt for monocrystalline panels, which are more efficient, even if space is limited.
How much does a balcony solar panel cost and is it profitable?
The price varies depending on the power and brand, but a balcony kit costs on average between 700 and 900 euros. It’s an investment that can be recouped in 4 to 6 years, as it helps reduce your electricity bills. Additionally, there are sometimes financial aids available to reduce the cost.